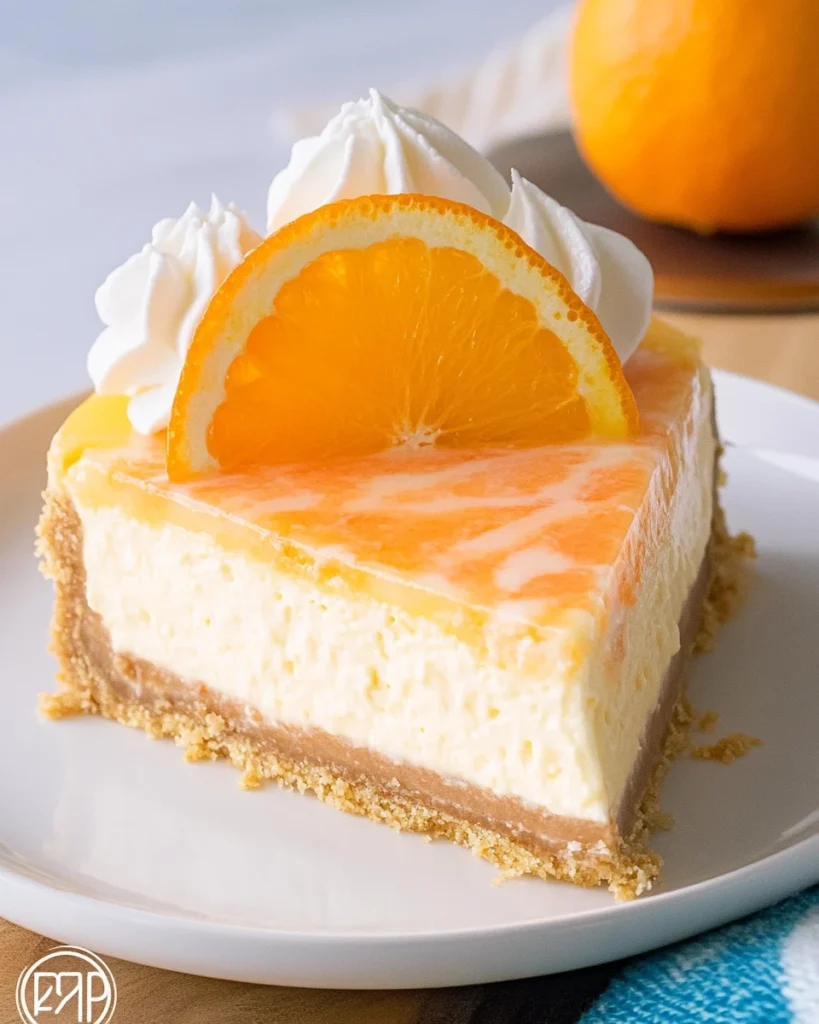
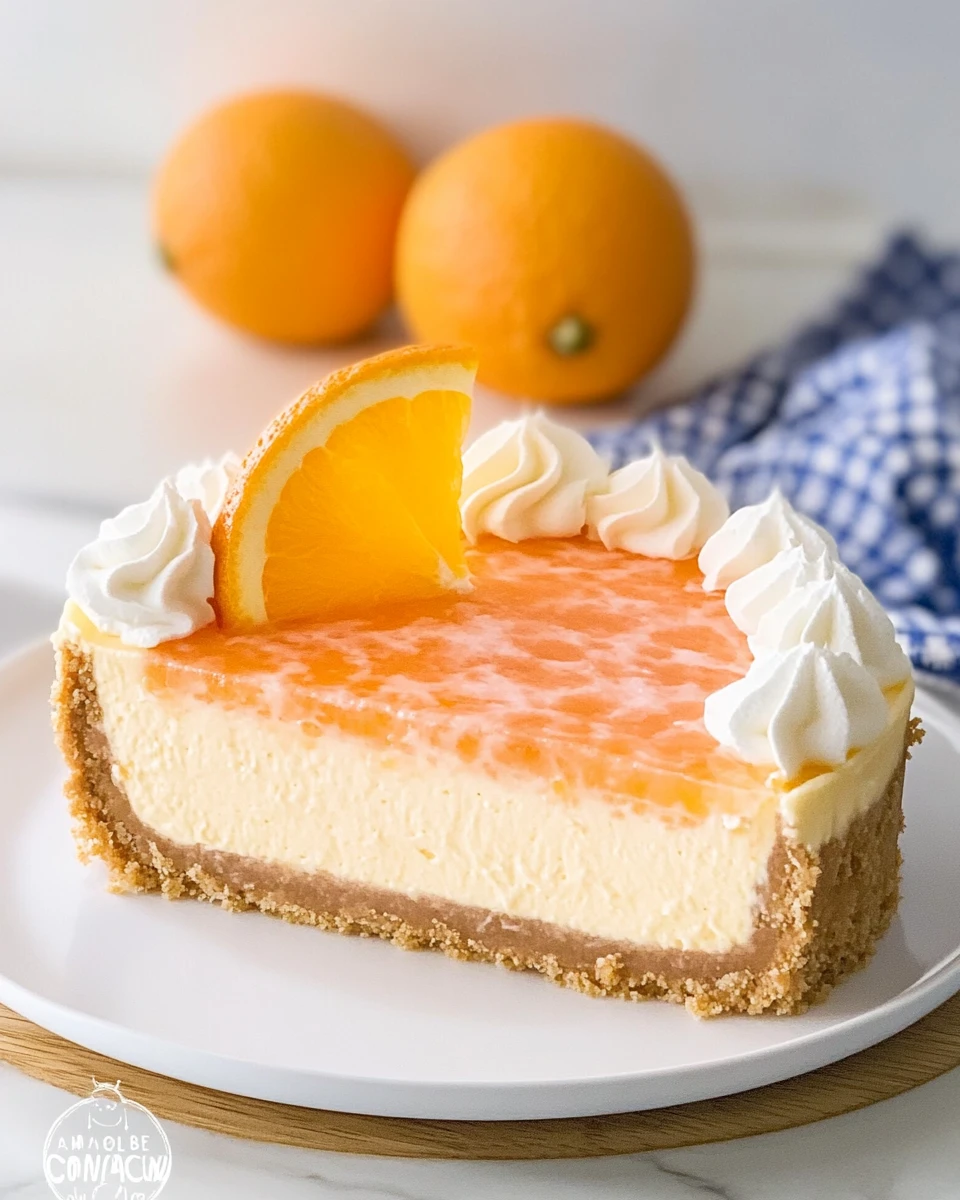
Creating a dessert that captures the essence of summer can often be a challenge, but this Orange Creamsicle Cheesecake combines the bright, zesty flavor of oranges with the rich creaminess of cheesecake. The no-bake method ensures that preparation is quick and easy, making it perfect for those warm days when you want a refreshing treat without the heat of the oven. When you slice into this cheesecake, the creamy texture and vibrant orange layer will transport you back to carefree summer days, perhaps even the nostalgic jingles of an ice cream truck. Plus, sharing it with friends and family makes every bite even sweeter.
Jump to:
- Why This Recipe Works
- Why You’ll Love This Orange Creamsicle Cheesecake
- Ingredients
- Preparing the Crust
- Create the Vanilla Wafer Crust
- Making the Cream Cheese Mixture
- Blend the Cream Cheese
- Preparing the Orange Gelatin
- Mix the Gelatin
- Whipping the Cream
- Prepare Whipped Cream
- Combining the Mixtures
- Layer the Cheesecake
- Chilling the Cheesecake
- Set in the Fridge
- Serving Suggestions
- Tips for Success
- Variations
- Storage Tips
- Pairing Ideas
- FAQs
- More Easy Desserts Recipes:
- 📖 Recipe Card
Now that you’re already daydreaming about those flavors, let’s dive into why this recipe works so wonderfully, what you’ll love about it, and all the delicious details you’ll need to whip it up at home!
Why This Recipe Works
Creating a dessert that captures the essence of summer can often be a challenge, but this Orange Creamsicle Cheesecake combines the bright, zesty flavor of oranges with the rich creaminess of cheesecake. The no-bake method ensures that preparation is quick and easy, making it perfect for those warm days when you want a refreshing treat without the heat of the oven.
Why You’ll Love This Orange Creamsicle Cheesecake
This delightful cheesecake offers a nostalgic taste that evokes feelings of childhood, reminiscent of summertime ice cream trucks. Its creamy texture, vibrant orange flavor, and simple preparation make it a go-to dessert for family gatherings, picnics, or just a sweet treat at home. Plus, it’s beautiful to serve, adding a pop of color to your table.

Ingredients
- 12 oz vanilla wafers
- 1½ cups granulated sugar, divided
- 1 stick unsalted butter, melted
- 2 (8 oz) blocks cream cheese, room temperature
- 2 cups heavy cream
- 1 (3 oz) box orange gelatin
- 1 cup boiling water
- ½ cup powdered sugar
- ½ teaspoon vanilla extract
- Zest of 1 orange
Preparing the Crust

Create the Vanilla Wafer Crust
Creating the crust is super simple. First, pulse the vanilla wafers in a food processor until fine crumbs form. After that, transfer the crumbs into a medium-sized bowl, then add ½ cup of granulated sugar and the melted butter. Stir until fully combined; it should resemble wet sand. Now, spray a 9-inch springform pan with cooking spray, and press the wafer mixture onto the bottom of the pan. This helps create that delicious foundation for all the creamy goodness to come. Chill in the freezer for 30 minutes to set.
Making the Cream Cheese Mixture
Blend the Cream Cheese
In a large bowl, use a hand mixer to beat the cream cheese and 1 cup of granulated sugar until smooth and creamy. Make sure to scrape down the sides occasionally for even mixing. This step creates the luscious base that complements the orange flavor beautifully.
Preparing the Orange Gelatin
Mix the Gelatin
In a small bowl, combine the orange gelatin with 1 cup of boiling water. Stir until fully dissolved and set aside to cool slightly. This step adds that iconic orange flavor that we all love so much.
Whipping the Cream
Prepare Whipped Cream
Now, it’s time to make that fluffy whipped cream! In a medium-sized bowl, beat together the heavy cream, vanilla extract, powdered sugar, and orange zest with a hand mixer until stiff peaks form. This will give your cheesecake a light and airy texture that’s simply irresistible.
Combining the Mixtures
Layer the Cheesecake
Gently mix half of the whipped cream into the dissolved orange gelatin and the other half into the cream cheese mixture. This creates two components that will alternate beautifully. Now, start by spreading the cream cheese mixture onto the chilled crust. After that, top it with the orange gelatin whipped cream layer, creating a vibrant dessert. Repeat the process if you have more layers, finishing with the orange gelatin layer. Each layer should be spread gently to maintain a fluffy texture.
Chilling the Cheesecake
Set in the Fridge
Cover the cheesecake and chill for at least 4 hours or overnight for the best texture and flavor. This step is crucial; it allows all the flavors to meld together, creating a creamy dream that’s set perfectly.
Serving Suggestions
Once chilled, slice and serve the cheesecake cold for a refreshing dessert. It’s perfect alongside fresh fruit, whipped cream, or a drizzle of orange syrup for that extra burst of flavor. Your guests will appreciate this vibrant plate!
Tips for Success
- Ensure your cream cheese is at room temperature for a smooth batter. It makes a big difference in how creamy your mixture turns out!
- Beat the heavy cream until stiff peaks form to achieve the light, fluffy texture desired. This might take a minute or two of mixing, but it’s worth it.
Variations
Feel free to get creative! Add a layer of chocolate ganache on top of the orange layer for a chocolatey twist. Alternatively, substitute lemon gelatin for a tangy lemon version of this cheesecake. The possibilities are endless!
Storage Tips
Make sure to store any leftovers covered in the refrigerator for up to 5 days. If you want to keep it longer, consider freezing slices in airtight containers for up to 2 months. This ensures you can enjoy a slice of summer whenever you like!
Pairing Ideas
Pair your Orange Creamsicle Cheesecake with a light white wine, such as Riesling or Sauvignon Blanc. You could also serve it alongside a refreshing citrus salad, enhancing those delightful flavors.
FAQs
1. Can I use a different flavor of gelatin?
Yes, other flavors like lemon or lime can work as delightful alternatives.
2. How can I make this recipe gluten-free?
Use gluten-free vanilla wafers for the crust.
3. Can I make this cheesecake in advance?
Absolutely! It’s best to make it the day before serving for optimal flavor and texture.
4. What if I don’t have a springform pan?
You can use a regular pie dish; just be careful when serving so you don’t break the crust.
5. Is it possible to use low-fat cream cheese?
Yes, using low-fat cream cheese will create a lighter version, but the texture may vary slightly.
This Orange Creamsicle Cheesecake is a delightful and refreshing dessert that perfectly captures summer’s spirit in every bite. Whether you’re hosting a gathering or just indulging yourself, this no-bake treat is sure to impress. Not only is it easy to prepare, but its bright, creamy taste will have everyone asking for seconds. Plus, the nostalgic flavors of orange bring childhood memories flooding back, making it a heartwarming addition to any meal. Enjoy every bite!
More Easy Desserts Recipes:
Did You Enjoy Making This Recipe? Please rate this recipe with ⭐⭐⭐⭐⭐ or leave a comment.
📖 Recipe Card
Print
Orange Creamsicle Cheesecake
This Orange Creamsicle Cheesecake is a refreshing, no-bake dessert that combines the bright flavor of oranges with rich cheesecake, perfect for summer gatherings.
- Total Time: 0 hours
- Yield: 12 servings 1x
Ingredients
- 12 oz vanilla wafers
- 1½ cups granulated sugar, divided
- 1 stick unsalted butter, melted
- 2 (8 oz) blocks cream cheese, room temperature
- 2 cups heavy cream
- 1 (3 oz) box orange gelatin
- 1 cup boiling water
- ½ cup powdered sugar
- ½ teaspoon vanilla extract
- Zest of 1 orange
Instructions
- Pulse vanilla wafers into fine crumbs and mix with melted butter and sugar.
- Press mixture into the bottom of a springform pan and chill for 30 minutes.
- Beat cream cheese with sugar until smooth.
- Dissolve gelatin in boiling water and let cool.
- Whip heavy cream, vanilla, powdered sugar, and orange zest until stiff peaks form.
- Mix half whipped cream with gelatin and half into cream cheese mixture.
- Layer cream cheese mixture and gelatin whipped cream onto crust.
- Chill for at least 4 hours or overnight.
- Slice and serve with fresh fruit or orange syrup.
Notes
Ensure cream cheese is at room temperature for best texture.
Store leftovers covered in the refrigerator for up to 5 days.
- Prep Time: 30 minutes
- Cook Time: 4 hours chill time
- Category: Dessert
- Method: No-Bake
- Cuisine: American
Nutrition
- Calories: 320
- Sugar: 18
- Sodium: 210
- Fat: 22
- Saturated Fat: 13
- Unsaturated Fat: 9
- Trans Fat: 0
- Carbohydrates: 30
- Fiber: 1
- Protein: 4
- Cholesterol: 60


