
Cream Cheese Mints are a delightful treat that many of us remember from special occasions. These little gems have a creamy texture and a burst of minty flavor that simply melts in your mouth. Picture this—you’re at a bridal shower or a festive holiday party, and there they are, arranged beautifully on a tray, waiting to be enjoyed. Making these mints at home is not only a fun endeavor but also a fantastic way to bring back sweet memories.
Jump to:
- Why This Recipe Works
- Why You’ll Love This Cream Cheese Mints
- Ingredients
- Preparing the Cream Cheese Mints
- Mixing the Base
- Incorporating Sugar
- Adding Flavor
- Finalizing the Dough
- Adding Color
- Shaping the Mints
- Imprinting the Mints
- Drying the Mints
- Storing the Mints
- Serving Suggestions
- Tips for Success
- Variations
- Storage Tips
- Pairing Ideas
- FAQs
- More Easy Breakfast Recipes:
- 📖 Recipe Card
The beauty of Cream Cheese Mints lies in their simplicity. With just a handful of ingredients, you can whip up a batch that impresses everyone. Plus, they are incredibly versatile! You can play around with colors and flavors, making them perfectly suited for any event or theme. Whether you love them pastel for springtime or in festive shades for the holidays, the fun really begins in the kitchen. Let’s roll up our sleeves and get started on creating these delicious treats!
Why This Recipe Works
The first key to these mints is the combination of cream cheese and butter. This pairing provides a rich, smooth base, ensuring that the mints come out creamy yet easy to shape. Adding powdered sugar is crucial, as it balances the sweetness and gives the mints the stability they need to hold their shape. The result is delightful minty bites that are both pleasing to the eye and your taste buds.
Why You’ll Love This Cream Cheese Mints
Cream Cheese Mints are more than just a candy; they are a nostalgic treat, often reminding us of joyous celebrations. You will love how their delightful flavor leaves a fresh taste. They are often found at gatherings such as bridal and baby showers, where their colorful presentation adds to the festivities. What’s more, they’re super simple to make and completely customizable! Friends will be asking for the recipe, and you’ll be proud to share your delicious creation.

Ingredients
- 4 oz (113 g) cream cheese, softened
- 1 tablespoon salted butter, softened
- 4 cups (500 g) powdered sugar, plus additional as needed
- ½ teaspoon peppermint extract
- ⅛ teaspoon vanilla extract
- Food coloring (optional)
Preparing the Cream Cheese Mints
Mixing the Base
To kick things off, grab your stand mixer and bowl. Begin by combining the softened cream cheese and butter. Beat them together until the mixture is creamy and well-combined.
Incorporating Sugar
Next, set your mixer to low speed. Start adding 2 cups (250 g) of powdered sugar gradually. It’s essential to ensure this step is done slowly, as it incorporates air and helps set the texture.
Adding Flavor
After the sugar is mixed in, it’s time to bring in the flavors. Pour in the peppermint and vanilla extracts, mixing thoroughly. Making sure these flavors are evenly blended is vital for that perfect minty taste!
Finalizing the Dough
When the flavors are in, continue to add the remaining powdered sugar. Keep your mixer on low speed, and don’t forget to scrape the sides and bottom of the bowl. This ensures a nice, uniform mixture. Your dough should be stiff yet not sticky; if it’s sticky, add a bit more powdered sugar.
Adding Color
If you’re up for some fun, this is where you can get creative! If you want a single color, simply add a few drops of food coloring and mix it in well. If you’d like multiple colors, divide the dough into portions and color each, creating an eye-catching variety.
Shaping the Mints
Now, take a teaspoon-sized amount of dough and roll it into balls between your palms until smooth. Place each ball on a baking sheet lined with wax paper. This keeps them from sticking and makes clean-up easier.
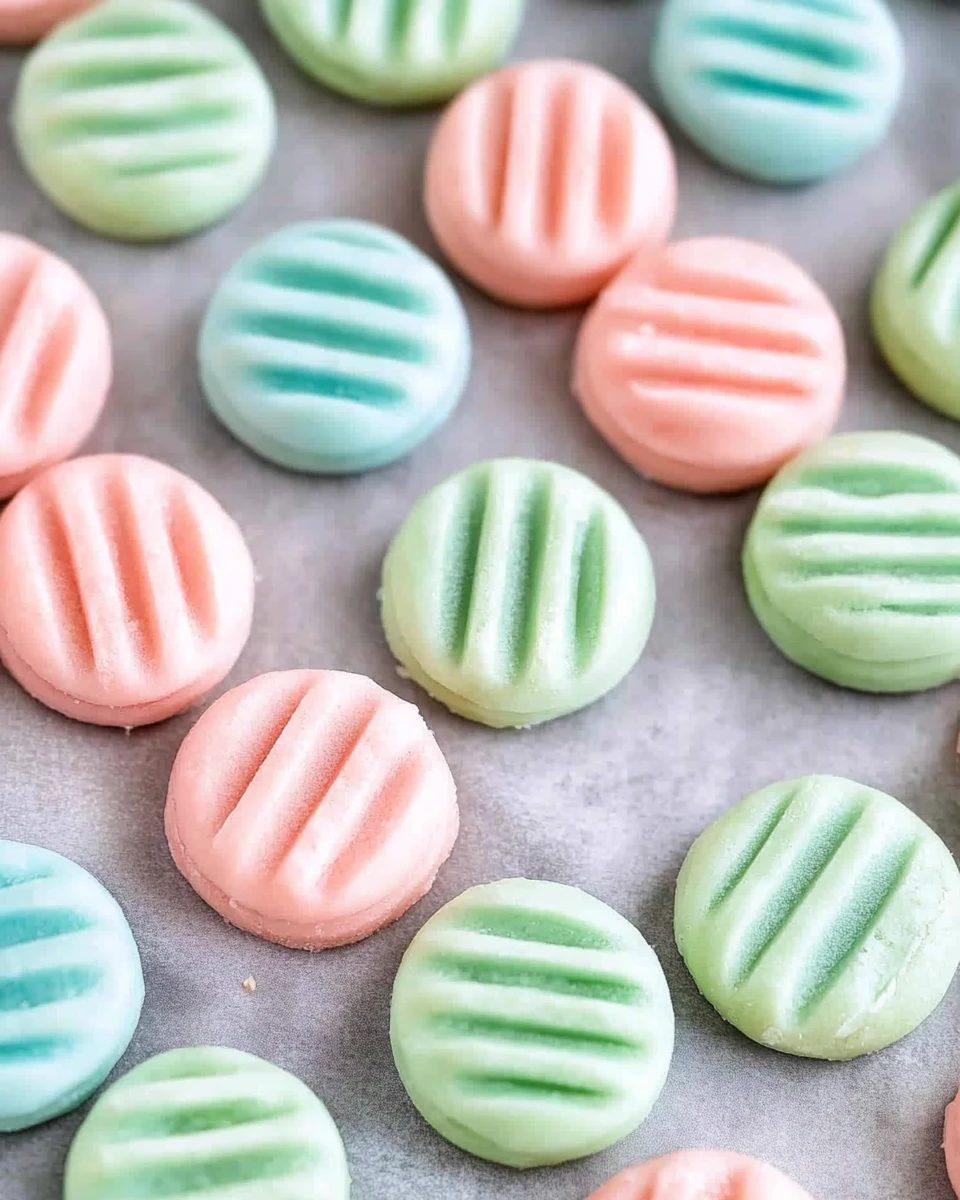
Imprinting the Mints
Here’s where the fun continues! To create an imprint, lightly dip the tines of a fork in powdered sugar and press down gently on each mint. This process not only looks nice but also helps prevent sticking.
Drying the Mints
Patience pays off here. Allow the mints to dry at room temperature for several hours. You want them firm, so they shouldn’t squish when you gently press them.
Storing the Mints
Once they’ve dried sufficiently, carefully transfer the mints into an airtight container. To keep them from sticking together, layer them with wax paper between each stack and store them in the refrigerator until it’s time to serve.
Serving Suggestions
These Cream Cheese Mints can be a lovely addition to any gathering. They pair splendidly with a cup of tea or coffee. They even work as a delightful palate cleanser after a meal. Their minty freshness makes them truly versatile!
Tips for Success
- Make sure your cream cheese and butter are completely softened. This makes mixing so much easier.
- Gradually adjust the thickness of your dough by adding powdered sugar until you get the consistency you like.
- Have fun experimenting with different food colors to match your occasion!
Variations
- Chocolate Mint Version: Feel free to mix in cocoa powder to give these mints a chocolaty flavor twist!
- Seasonal Colors: Use different food colorings to tie them in with holiday themes—think red and green for Christmas or pastels for Easter.
- Flavored Extracts: Get adventurous by trying almond or lemon extracts for unique flavor combinations!
Storage Tips
For optimal freshness, store the mints in the refrigerator in an airtight container. They can last up to two weeks. To maintain the best texture, make sure to layer them with wax paper.
Pairing Ideas
Cream Cheese Mints are fabulous when paired with fresh fruit, cookies, or pastries. They also complement a range of beverages, whether it’s iced tea or a bubbly champagne toast at your next celebration.
FAQs
1. How long do Cream Cheese Mints last?
When stored correctly in an airtight container, Cream Cheese Mints can last for up to two weeks in the refrigerator.
2. Can I freeze Cream Cheese Mints?
Definitely! You can freeze them for up to a month. Just ensure they’re well-wrapped to avoid freezer burn.
3. What can I use instead of peppermint extract?
If peppermint isn’t your thing, feel free to use spearmint, vanilla, or almond extracts to switch it up!
4. How can I customize the colors of the mints?
You can add gel food coloring before rolling them out. If you’d like unique designs, try dividing the dough and creating swirls or marbling for a vibrant effect.
5. Are there any alternatives for using cream cheese?
You can substitute cream cheese with Neufchâtel cheese for a lighter option. Just keep in mind that this may slightly change the texture.
These delightful Cream Cheese Mints are a nostalgic confection perfect for any celebration. Easy to prepare and incredibly tasty, they add a touch of sweetness to your gatherings. Feel free to get creative with flavors and colors, making them truly your own. Whether you enjoy them as a simple treat or use them to enhance a dessert table, these mints are bound to impress!
More Easy Breakfast Recipes:
- Pecan Caramel Banana Cake
- Banana Peanut Butter Cups
- Smoked Salmon Breakfast Bagel
- Snickerdoodle Mug Cake
Did You Enjoy Making This Recipe? Please rate this recipe with ⭐⭐⭐⭐⭐ or leave a comment.
📖 Recipe Card
Print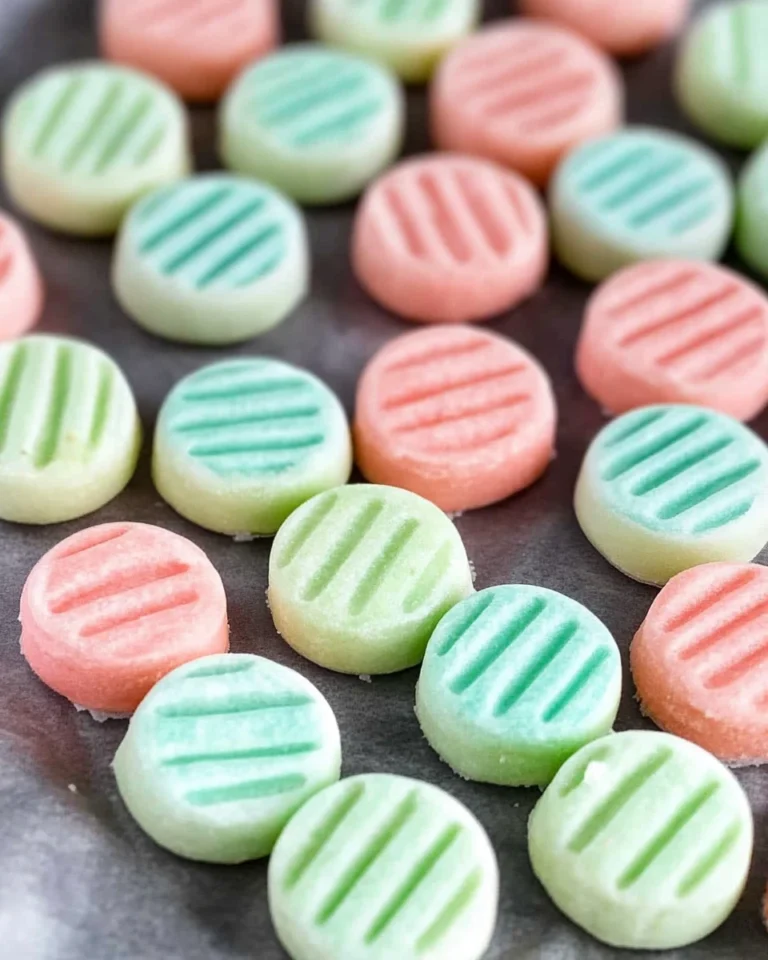
Cream Cheese Mints
These Cream Cheese Mints are a nostalgic treat that offer a delicious minty flavor and creamy texture. Easy to make and customizable, they’re perfect for any celebration.
- Total Time: 20 minutes
- Yield: Approximately 30 mints 1x
Ingredients
- 4 oz (113 g) cream cheese, softened
- 1 tablespoon salted butter, softened
- 4 cups (500 g) powdered sugar, plus additional as needed
- ½ teaspoon peppermint extract
- ⅛ teaspoon vanilla extract
- Food coloring (optional)
Instructions
- Combine softened cream cheese and butter in a bowl and beat until creamy.
- Gradually add 2 cups of powdered sugar on low speed.
- Mix in peppermint and vanilla extracts thoroughly.
- Add remaining powdered sugar until dough is stiff but not sticky.
- Color dough with food coloring if desired.
- Roll teaspoon-sized amounts into balls and place on wax paper.
- Use a fork dipped in powdered sugar to create imprints.
- Let the mints dry at room temperature for several hours.
- Transfer dried mints to an airtight container with wax paper layers.
Notes
Ensure cream cheese and butter are completely softened for easier mixing.
Adjust the thickness of the dough by adding powdered sugar to your desired consistency.
Experiment with different food colors to match your occasion.
- Prep Time: 20 minutes
- Cook Time: 0 minutes
- Category: Dessert
- Method: Mixing and Shaping
- Cuisine: American
Nutrition
- Calories: 50
- Sugar: 7 g
- Sodium: 15 mg
- Fat: 2 g
- Saturated Fat: 1 g
- Unsaturated Fat: 1 g
- Trans Fat: 0 g
- Carbohydrates: 8 g
- Fiber: 0 g
- Protein: 0 g
- Cholesterol: 10 mg


