
No-Bake Graduation Cake Pops are the perfect way to celebrate a big achievement. Whether you’re tossing your cap in the air or cheering on a loved one, these delightful treats bring an extra touch of sweetness to the festivities. The beauty of this recipe lies in its simplicity—no baking means less work for you and more time for fun. Plus, with vibrant colors and tasty flavors, they make for an eye-catching addition to any graduation party spread. Imagine sinking your teeth into a moist cake pop, soft sugar cookie mixed with creamy goodness, all coated in smooth chocolate. Sounds amazing, right? As we walk through this recipe together, you’ll find that creating these pops can also be a fun bonding activity, whether with kids, friends, or fellow graduation celebrators. Let the celebration begin, and treat yourself (and others) to a bite of pure happiness!
Jump to:
- Why This Recipe Works
- Why You’ll Love This No-Bake Graduation Cake Pops
- Ingredients
- Prepare Your Cake Pop Stand
- Create Your Stand
- Making the Cake Pop Mixture
- Combine Cookies and Cream Cheese
- Shape the Cake Pops
- Melting the Chocolate
- Prepare for Dipping
- Assembling the Cake Pops
- Insert Sticks
- Decorating Your Cake Pops
- Melt Chocolate for Dipping
- Dip the Cake Pops
- Add Sprinkles
- Final Touches
- Serving Suggestions
- Tips for Success
- Variations
- Storage Tips
- FAQs
- More Easy Desserts Recipes:
- 📖 Recipe Card
Why This Recipe Works
Combining soft sugar cookies with cream cheese creates a moist and flavorful base perfect for cake pops. The creaminess of the cheese enhances the sweetness, bringing the ingredients together beautifully. Plus, when you skip the baking step, you save valuable time, allowing you to focus on the fun side of graduation. After all, who wants to spend hours in the kitchen? Using quality chocolate ensures a smooth and delicious outer layer that melts in your mouth. This combination makes for a treat that’s hard to resist, whether at a lively graduation party or a quiet family gathering.
Why You’ll Love This No-Bake Graduation Cake Pops
These cake pops are incredibly customizable, allowing you to incorporate school colors and decorations. Whether your grad is off to college or finishing high school, creating pops in their school’s colors is a fun way to personalize the celebrations. Cooking together also makes for a great activity with children or friends, turning the kitchen into a hub of laughter and creativity. Plus, these cake pops are the perfect dessert for guests of all ages, bringing smiles and sweet memories to every table. Everyone loves a tasty treat, especially one that celebrates milestones!
Ingredients
- 1 (13.5 oz) package frosted sugar cookies (Lofthouse or store brand)
- 8 oz cream cheese, softened (not melted)
- 4-8 oz white chocolate baking bar (not white chocolate chips)
- 10 oz chocolate chips (preferably dark)
- 1 tsp coconut oil (optional)
- Candy melts in your school colors
Prepare Your Cake Pop Stand
Create Your Stand
Before diving into making those cake pops, it’s a good idea to prepare a stand. You can use a store-bought cake pop stand, a foam block, or even a cardboard box with holes poked in it. Cover your stand with plastic wrap to catch any chocolate drips if you’re presenting them afterward. This way, your beautiful creations stay neat and tidy.
Making the Cake Pop Mixture
Combine Cookies and Cream Cheese
Start by letting the cream cheese come to room temperature—this step is crucial! Just don’t microwave it, as that’ll mess with the texture. In a stand mixer, crumble your package of cookies until they’re nice and fine. Then, add in the softened cream cheese and mix until everything is combined. The result should be a smooth and doughy mix that you can easily shape.
Shape the Cake Pops
Grab an ice cream scoop or a tablespoon and measure out about 1.5 scoops of the mixture for each cake pop. Roll the mixture into balls, using your palms to form them gently. Once shaped, it’s time to chill these bites of goodness. Pop them in the fridge for about 20 minutes; this helps them hold their shape during the next steps.
Melting the Chocolate
Prepare for Dipping
Now, let’s get to the fun part—melting the chocolate! Take ¼ cup of chocolate and place it in a glass bowl. Use the microwave, heating it in 30-second intervals and stirring each time to avoid scorching. This method helps ensure that your chocolate stays silky smooth, making for the perfect coating later.
Assembling the Cake Pops
Insert Sticks
Once your cake pops are chilled, it’s time to add the sticks. Dip a lollipop stick about ¼ inch into the melted chocolate. Then, carefully insert it halfway into each cake pop. Allow the pops to chill again for a few minutes so the chocolate sets securely around the stick.
Decorating Your Cake Pops
Melt Chocolate for Dipping
Repeat the melting process, but this time with 1 cup of chocolate. If you want a smoother finish, consider adding that teaspoon of coconut oil. It really helps the chocolate coat the pops beautifully.
Dip the Cake Pops
Carefully dip each cake pop into the melted chocolate, ensuring it’s fully covered. Just a quick twist as you lift it out will help prevent any excess chocolate from dripping—nobody likes a messy cake pop! Allow the excess to drip back into the bowl.
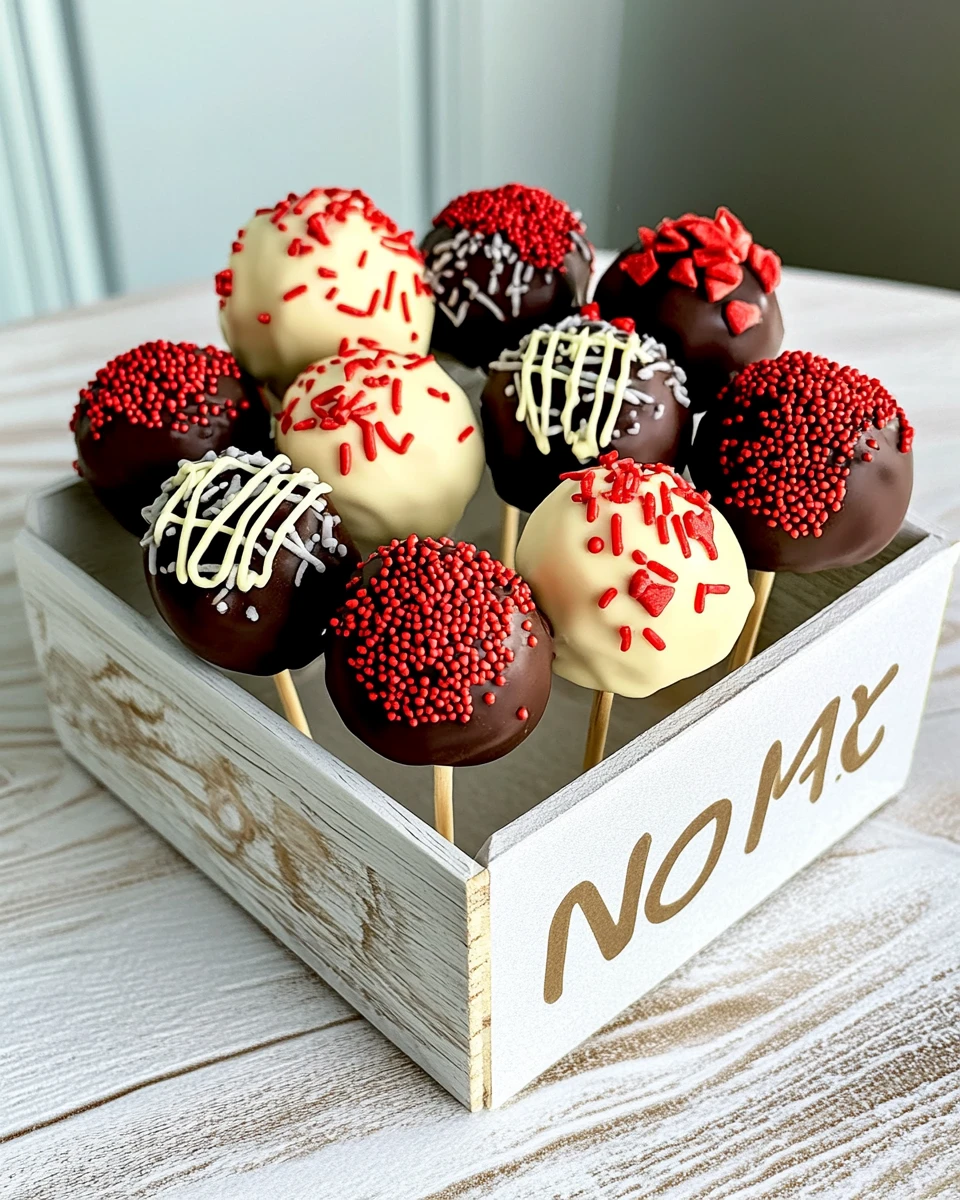
Add Sprinkles
If you’re feeling festive, now’s the time to sprinkle on your toppings! Add sprinkles or edible glitter before the chocolate sets so it sticks nicely. Let the completed cake pops chill in the fridge for at least 30 minutes to firm up completely.
Final Touches
For those who want to get creative, fit a piping bag with a small round tip. Melt some chocolate in a contrasting color to decorate your cooled pops. Use your artistic flair to create designs. Once done, pop them back in the fridge for another 30 minutes.
Serving Suggestions
When you’re ready to serve, consider pairing your No-Bake Graduation Cake Pops with a selection of mini cupcakes and cookies to create a delightful dessert table. Serve them alongside festive drinks, like sparkling lemonade, for a vibrant atmosphere that encourages celebration. These treats will shine bright at any gathering, both in flavor and presentation.
Tips for Success
To achieve the best results, ensure that your cream cheese is at room temperature before mixing. This helps everything blend smoothly. Keep your cake pops chilled between steps to maintain their shape and make coating simpler. And if you want to switch things up, try using different chocolate flavors for surprising variety in taste.
Variations
Feeling adventurous? Consider using flavored cream cheese, like strawberry or chocolate, for a fun twist on the classic recipe. You can also swap in different cake bases, such as brownies or a basic vanilla cake, to change the texture and flavor profile. The possibilities are endless!
Storage Tips
Store your completed cake pops in an airtight container in the fridge for up to a week. If you’ve used coconut oil, ensure you place them upright to prevent the chocolate from sticking to the container. Treat yourself to a cake pop whenever you’re craving a sweet treat!
FAQs
-
Can I use cookie dough instead of cookies?
Absolutely! Cookie dough can give a different flavor profile while maintaining that yummy sweetness. -
How do I prevent chocolate from cracking?
Avoid overheating the chocolate—not only will it crack, but it can also lose its luster. Adding coconut oil can help create a smoother finish. -
Can I freeze cake pops?
Yes! They can be frozen for up to three months. Just make sure they’re stored in an airtight container to keep them fresh. -
What other occasions can I use this recipe for?
No-Bake Graduation Cake Pops are fantastic for birthdays, weddings, or any celebration that calls for sweetness and joy! -
Can I omit the cream cheese?
You can use frosting instead, but keep in mind that the texture will change. It may not hold together as well.
No-Bake Graduation Cake Pops are not only a visually appealing treat but also an emotional connection to a milestone moment. With customizable decorations, they serve as a sweet symbol of celebration, perfect for any graduation gathering. Enjoy them at your next event, where each bite brings joy and fond memories. Share your cake pops with friends and family for a truly delightful experience!
More Easy Desserts Recipes:
- Easy Homemade Rhubarb Crumble With Ginger
- Rhubarb Tart with Custard
- Strawberry Rhubarb Pie Cookies
- Easy Rhubarb Butter
Did You Enjoy Making This Recipe? Please rate this recipe with ⭐⭐⭐⭐⭐ or leave a comment.
📖 Recipe Card
Print
No-Bake Graduation Cake Pops
These No-Bake Graduation Cake Pops are a fun, colorful treat combining sugar cookies and cream cheese for a deliciously moist base. Perfect for any celebration!
- Total Time: 30 minutes
- Yield: 24 cake pops 1x
Ingredients
- 1 (13.5 oz) package frosted sugar cookies (Lofthouse or store brand)
- 8 oz cream cheese, softened (not melted)
- 4–8 oz white chocolate baking bar (not white chocolate chips)
- 10 oz chocolate chips (preferably dark)
- 1 tsp coconut oil (optional)
- Candy melts in your school colors
Instructions
- Prepare a stand for the cake pops.
- Crumble the cookies and mix with softened cream cheese.
- Shape the mixture into balls and chill for 20 minutes.
- Melt chocolate and dip lollipop sticks before inserting into cake pops.
- Dip each cake pop into melted chocolate and add toppings if desired.
- Chill the finished pops for at least 30 minutes before serving.
Notes
Make sure cream cheese is at room temperature for easy mixing.
Use quality chocolate for a smooth coat.
Customize with different school colors for added fun.
- Prep Time: 30 minutes
- Cook Time: 0 minutes
- Category: Dessert
- Method: No Bake
- Cuisine: American
Nutrition
- Calories: 150
- Sugar: 10g
- Sodium: 50mg
- Fat: 8g
- Saturated Fat: 4g
- Unsaturated Fat: 3g
- Trans Fat: 0g
- Carbohydrates: 18g
- Fiber: 1g
- Protein: 2g
- Cholesterol: 10mg


